# Important Factors

{% hint style="success" %}
The following guidelines describe data collection best practices, but are not exhaustive. You may obtain high quality markerless motion capture data under different conditions from those described below.
{% endhint %}

## **Physical Setup**

### Configuration

When setting up cameras, use full circle or oval configurations with sagittal, frontal, and oblique views. Try to capture the person from all sides, and aim for a roughly symmetrical camera setup where possible.

### Height

Position cameras at a height of approximately 4 to 8 feet (1 to 2.5 meters). High cameras can lead to views with more self-occlusion of people and their segments,

### Perspective

Avoid unusual angles and strive to keep all cameras flat and level, with the person relatively upright within the image frame.

### Orientation

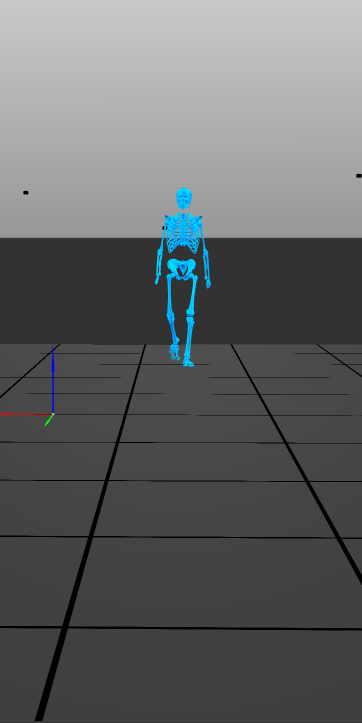
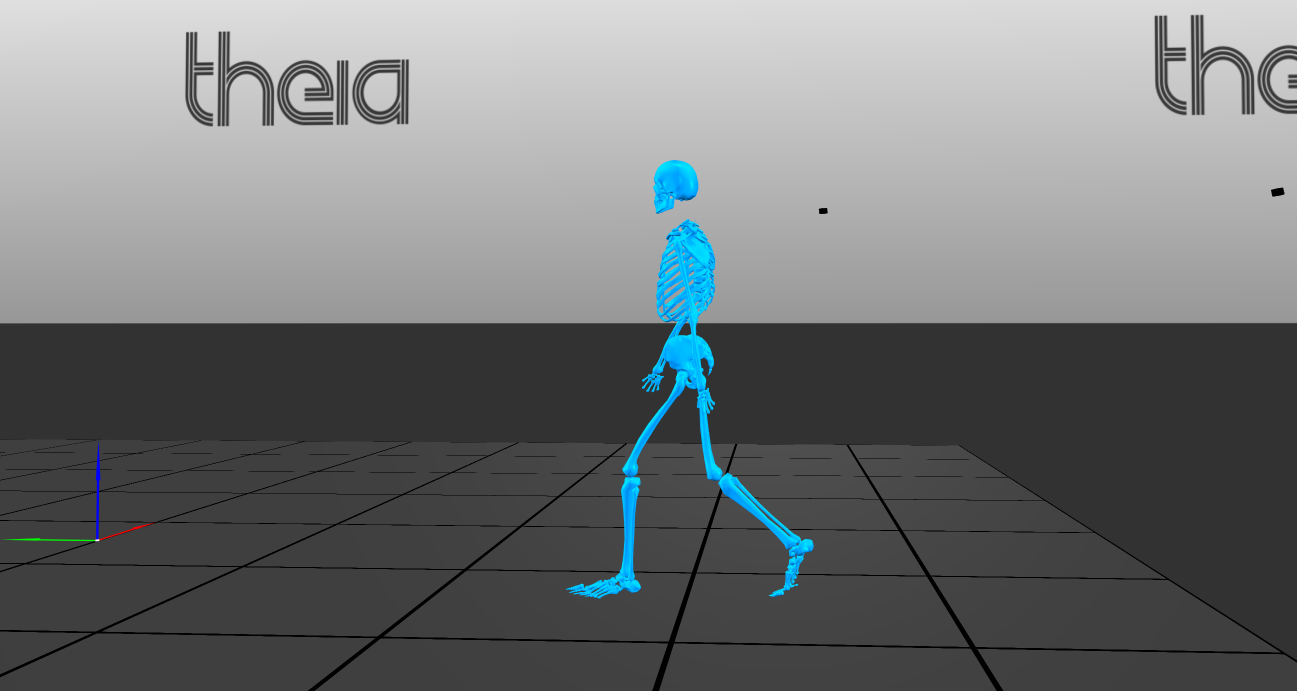
Consider how each camera should be oriented to best match the movement and maximize the capture volume. For example, when recording flat overground walking the sagittal views are more useful in landscape orientation while frontal views are more useful in portrait orientation.

<figure><img src="/files/jH2KvmagYt7uC64hXkoy" alt=""><figcaption><p>Landscape View Example Setup</p></figcaption></figure>

<figure><img src="/files/EXSMOu1gzfuSvl8juYDn" alt=""><figcaption><p>Portrait View Example Setup</p></figcaption></figure>

For more information please refer to our [Camera Setup Blog Post here.](https://www.theiamarkerless.com/blog/where-do-i-install-my-cameras)

## **Camera Settings**

### Frame Rate&#x20;

​Selecting the appropriate frame rate is crucial for capturing movements accurately. A frame rate too low may miss subtle movements, while an excessively high frame rate can require lowered video quality and result in unnecessarily large files and long processing times.&#x20;

To determine the optimal frame rate, start with a literature review to understand standard practices for capturing your movement of interest, or a similar movement. Next, assess your camera hardware's capabilities, ensuring it can support the desired frame rate without compromising resolution. Some cameras offer 'windowing' features to increase frame rates by capturing only a portion of the sensor; however, this should be used cautiously to avoid missing parts of the subject. Conduct pilot studies to test different frame rates, reviewing the clarity and quality of the captured movements. Be mindful that the higher frame rates and shorter exposures/shutter speeds needed to capture very fast movements may require additional lighting and can lead to issues like frame drops due to increased data throughput. Balancing these factors through thorough testing and consideration will help you select a frame rate that meets your experimental needs.

For more information please refer to our [Frame Rate Blog Post here.](https://www.theiamarkerless.com/blog/theiaframerate)&#x20;

### Resolution

Use the highest resolution supported by your camera system; this may be impacted by the frame rate selected for recording. Aim for the participant to be captured with 500 or more pixels in height in the frame.

* \~½ frame height (landscape @ 1080p)
* \~¼ frame height (portrait @ 1080p)

{% hint style="info" %}
**Note:** Theia3D currently supports videos that are 4 MP resolution or smaller. Higher resolution videos are not currently supported.
{% endhint %}

### Exposure or Shutter Speed

Exposure and shutter speed are two ways to describe the length of time for which the camera sensor is allowed to absorb light, which is controlled by the opening and closing of the camera's shutter. Exposure describes the 'open' duration explicitly (e.g. 8000 microseconds) while shutter speed uses fractions of a second (e.g. 1/125 s). Thus, it is straightforward to convert between these values: 1/125 s = 0.008 s = 8000 microseconds.

Varying the image exposure impacts the image brightness and the motion blur of moving objects or people, with longer exposures leading to brighter images and more motion blur and shorter exposures leading to darker images and less motion blur.

For markerless motion capture, it is important to capture images that are crisp and clear, with minimal motion blur, while remaining bright. The appropriate exposure to avoid motion blur depends on the movement being captured; this is another camera setting that should be considered during pilot testing to determine an exposure that meets the experimental needs.

### Gain or ISO

Gain and ISO are settings available on most cameras that can be used to adjust the overall image brightness by amplifying the signals from the sensor. Too high of a gain or ISO correction can lead to degradation in the image quality and increased image noise, so it is important to set this after an appropriate exposure is determined.

## Lighting

​Proper lighting is crucial for high-quality video data in markerless motion capture. Consider the following lighting factors when designing or setting up a capture volume.

### Indoor vs. Outdoor Environments

* Outdoor ambient light levels are typically much higher than indoors, even on cloudy days. Higher intensity ambient lighting allows fast movements to be captured more easily, but can be challenging to deal with when adjusting camera settings.
* Outdoors, lighting conditions can change rapidly; be attentive and adjust camera settings to prevent overexposed or dark images. Be mindful of the sun's position throughout the data collection session to avoid harsh backlighting or silhouetting.
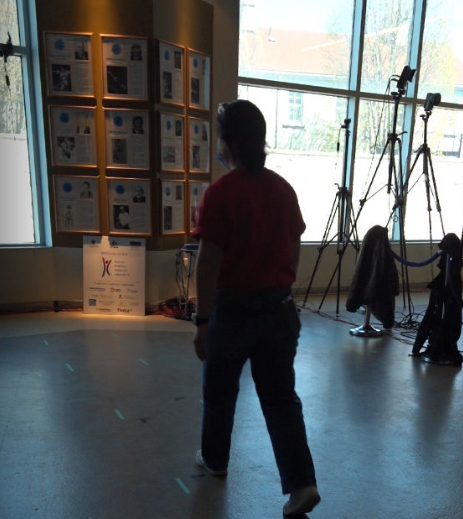
* Indoors, be aware of natural light sources like windows, which can cause uneven lighting and silhouette effects.&#x20;
* If using the [extrinsic chessboard calibration](/theia3d-documentation/data-collection/recording-extrinsic-chessboard-calibrations.md) method, avoid chessboard positions and angles that result in glare on the surface of the board - outdoors, this means paying attention to the position of the sun; indoors, this means paying attention to lights and windows.

<figure><img src="/files/6JD6x4J8sy9IClucyDgE" alt=""><figcaption><p>Large windows can provide considerable backlight, turning the subject into a silhouette.</p></figcaption></figure>

### Intensity

Light intensity describes the brightness of the incident light, typically measured in lumens (output of the light source) or lux (intensity over a specified area, lumens per square meter). Typical indoor lighting intensity can range from 100 lux (average home lighting) to 2000 lux (bright workshop lighting), while outdoor light intensity ranges from 1000 lux (overcast dark) to 100,000 lux (bright, direct sunlight). For markerless motion capture, aim for at least 500 lux, with 1000 lux preferred.

<figure><img src="/files/zqZPPhcZ0Ot09qxFxulB" alt=""><figcaption><p>Lighting can be described by the total output of the source (lumens) or the distribution of that light over a specified area (lux)</p></figcaption></figure>

### Colour Temperature

Colour temperature describes the hue of the emitted light, expressed in Kelvin. For markerless motion capture environments, a light source emitting a neutral to bright, cool white light in the range of 3500K to 6500K is ideal.

### Colour Rendering Index

Colour Rendering Index (CRI) is a measure of the the colour accuracy of objects illuminated by a light source; essentially, how the incident light from the source impacts the appearance of the object's colour. Measured on a scale from 0 to 100, most modern lights will have a CRI of 70+, which is suitable for markerless motion capture.

### Directionality and Uniformity

Diffuse, non-directional lighting is often better than directed light as it provides more consistent illumination of people and lower potential for surface glare. However, directed light can also provide excellent and even lighting if it is provided from all directions. It is still important to avoid 'hotspots' which can lead to parts of thfe image or person being overexposed or washed out while the rest of the image is properly exposed.

<figure><img src="/files/8TRduiOEIZwdwLa7fvm9" alt=""><figcaption><p>More diffuse, evenly distributed lighting</p></figcaption></figure>

<figure><img src="/files/nNUDlVZ67gJ4YjuZHnwm" alt=""><figcaption><p>More focused, directed lighting</p></figcaption></figure>

### Flicker and Frequency

Avoid light sources that flicker near your recording frame rate to prevent inconsistent brightness between video frames.&#x20;

For typical fluorescent lighting, this is 100-120 Hz depending on the AC power frequency. LED, halogen, or fluorescent tubes with electronic ballasts are some bulb options with reduced or no flicker, which will provide more even lighting when capturing high speed video data.

Lights that flicker at a similar frequency as the camera frame rate can lead to inconsistent image brightness and may lead to over- or under-exposure of the participant, or inadequate image brightness during some frames.

## **Subject Attire**

Theia3D provides 3D pose estimates that are generally robust to changes in attire. Recommendations for subject attire include:

* Body-fitting clothing, such as most casual or athletic attire, is best. Each limb should be discernible from the rest of the body. Skin-tight clothing is not required.
* Avoid clothing that obscures the body or limbs. This includes long skirts, full length dresses, or excessively bulky or baggy clothing.
* Clothing should provide rich visual features, such as visible creasing, shadows, or other textures.
* Lighting is often more important than attire color, as it impacts the visual richness of the attire. Under adequate lighting conditions black attire is acceptable, but lighter colors generally provide more visual features, especially in low-light environments.

## Multi-Person Tracking

Theia3D supports multi-person tracking in controlled environments where individuals remain largely distinguishable throughout the capture. Tracking in dense, high-contact scenarios, such as basketball games, wrestling matches, or other activities involving significant and sustained full-body overlap between participants is not guaranteed or supported. For best results, ensure that the people being tracked are visible and separable in the camera views for the majority of the trial.

{% embed url="<https://youtu.be/inWfyBegi3A>" %}


---

# Agent Instructions: Querying This Documentation

If you need additional information that is not directly available in this page, you can query the documentation dynamically by asking a question.

Perform an HTTP GET request on the current page URL with the `ask` query parameter:

```
GET https://docs.theiamarkerless.com/theia3d-documentation/data-collection/important-factors.md?ask=<question>
```

The question should be specific, self-contained, and written in natural language.
The response will contain a direct answer to the question and relevant excerpts and sources from the documentation.

Use this mechanism when the answer is not explicitly present in the current page, you need clarification or additional context, or you want to retrieve related documentation sections.